Showing posts with label glamour. Show all posts

Friday, May 3, 2013

Tan in the Shower?! Say What?!


This is now being sold at QVC and this is how is works.

Put one pump of the body wash on the loofa applicator and apply to your skin (while standing in a dry part of the shower, away from the shower head). Use a circular motion on one body part, such as your arm, and watch the color come to fruition. Repeat this by using one pump for each body part you want to get some color. Rinse skin when you're done. Afterward, pat the skin dry (don't rub!) and apply a rich moisturizer. Your tan will get deeper in color throughout the day.


The Josie Maran Argan Glow Self Tanning Body Wash just went on sale for $34.98 on QVC.com


Thanks Glamour.com for the update on that! This is on my "Must Try" list!

XOXO- ALittleJuneBug

Friday, April 12, 2013

Friday Hair Envy


Oh Nina, not only do you have a smoking hot boyfriend
but your hair is smoking hot.

The Vampire Dairies please hurry an come back on.
Is it April 25th yet?


XOXO-AlittleJuneBug

Monday, April 8, 2013

She looks so cute


Jenna Dewan-Tatum not only has one hot hubby but
she makes looking pergo look Fab!!!!


XOXO-AlittleJuneBug


Photos: Pamela Hanson

Tuesday, April 2, 2013

Style Crushing


I am so style crushing these items from the following sites.
Shophopes.com
Forever21.com
Lulus.com


Love these shorts.


Love this whole outfit.

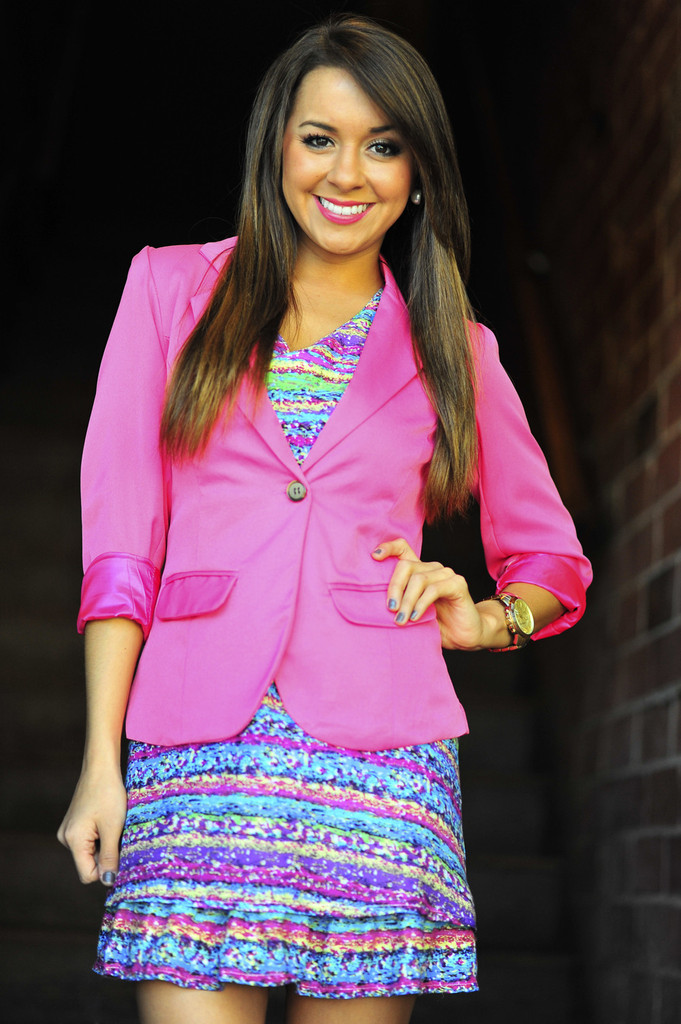
This blazer paired with the dress below.
Heavenly.
(Queue the Angels singing)


And a Dainty necklace to top things off.


XOXO-AlittleJuneBug

Monday, April 1, 2013

Shadows & Light


post + photography by amy nadine, graphic design by eunice chun
When you apply foundation to your entire face, you’ve created a blank canvas, so you have to go back and add the dimensions back in. Remember in art class how you used darker shading to push an area away and lighter shading to pull an area towards you? That’s all we’re doing here! It creates the illusion of a stronger jawline, more chiseled cheeks and a slimmer face. And the easiest way to do this is by drawing the letter E on each side of your face to contour and the letter C on each side of your eyes. Anyone can do that, right? I’m showing you how to do it with both cream and powder formulas together for staying power, but you can certainly do one or the other.
TOOLS:
  • Cream Foundation or Cream Bronzer — you can simply find a cream foundation that is four or so shades darker than your foundation (I love Jouer Age-Repairing Perfector Foundation in Tawny for fair to medium skin tones or Almond for darker skin tones) or you can try Hourglass Illume, a cream bronzer + highlight duo that I’ve been using on my clients with fair to medium skin tones for at least three years now.
  • A Flat-headed Foundation Brush — this really presses the cream into the skin and does all the work for you. I love Dior Full Coverage Fluid Brush for an investment but Sonia Kashuk Flat Top Multi-Purpose Brush will get the job done too.
  • Blush/Contour Brush — the best brush to blend cream foundation or bronzer is a natural-bristled round-headed one that is densely packed like the Cozzette Contour Stylist Brush, the iconic must-have for makeup artists at Fashion Week around the world.
  • Bronzing + Highlighting Powder — you can certainly buy them separately but I love Trish McEvoy Dual Resort Bronzer + Highlight because it’s the perfect amount of warmth with a hint of shimmer.
  • Angled Contour Brush — I love Sigma’s Large Angled Contour Brush for its fluffy angled bristles.
STEPS:
  1. After you’ve applied your foundation all over your face and neck but before any powder, dip your brush into the cream bronzer/darker foundation to load it up.
  2. Swirl the brush on the back of your hand to take away some of the intensity.
  3. Start at the middle of the top of your hairline and begin the letter E by tracing along the perimeter down to your temple.
  4. Suck in your cheeks to see exactly where your cheekbones are then continue the middle prong of the letter E by sweeping the brush from your temple to just underneath the cheekbone (to hollow it out).
  5. Go back along the underside of your cheekbone to the ear then down to your jawline. Finish the E by sweeping the brush just on and underneath the jawline. I like to also fill in the whole neck to really shade it, but I have profile issues and do anything I can to make mine more pronounced!
  6. Repeat on the other side.
  7. Now swirl off any remainder on a tissue or the back of your hand and use the same brush to fill up with the cream highlighter.
  8. Draw the letter C by holding the brush in the middle of your forehead just above your brow and outlining the eye all the way to your temple then down under your eye just above your cheekbone. This will pull that area forward and really highlight your eyes.
  9. Repeat on the other side.
  10. Take the dry blush brush and go back over the E’s and C’s in swirling motions to really blend it into the skin. You could also use a Beauty Blender sponge to do this.
  11. Finish by grabbing the angled contour brush and going over the E with the bronzing powder and the C with the highlighting powder.
Thank you  http://thebeautydepartment.com/ for this great read.


                                                              XOXO-AM

Friday, March 29, 2013

This was brought to you courtesy of Glamour Magazine


How to achieve this look:
(Best of all it is so easy)


Step 1. Start with a base.
"I started with a beautiful dewy base and warmed up Kate's skin with a golden bronzer to emphasize her healthy glow."
Step 2. Line eyes.
"With a kohl pencil, I rimmed her eyes, not paying too much attention to precision. I rimmed the outer corner of the eye a little heavier to help create depth. I wanted the heaviest part of the makeup on the outer corner."
Step 3. Apply blush and a highlighter.
"To brighten the overall face, I used a highlighter on Kate's cheekbones, brow bones, and tip of her nose. I then applied a touch of peach blush on the apple of her cheek for freshness."
Step 4. Add gloss.
"I used a nude lip gloss that I dabbed on with my ring finger for a very natural look."

A closer look at the make up


As for her hair, David Babaii (Kate's hairstylist for 12+ years and a dear friend) created the look. "It is really all about showing off what I call the Kate Hudson Look. It is a look that truly shows off her healthy, shiny hair. Kate is my generation's Brigitte Bardot, showing off soft, voluptuous hair that is touchable and glamorous. In my eyes, she has a signature look that most women today can ask for."
Step 1. Prep the hair.
"I added a hair serum and strong-hold mousse before blow-drying to give it a natural, long-lasting hold."
Step 2. Blow-dry with a medium-size brush.
"I used a medium round brush at the root area to add volume, then switched to a large round brush to smooth and create soft rounded edges."
Step 3. Finger-comb.
"With my fingers, I combed through and allowed the hair to fall naturally into place. I then misted hair with hairspray for a soft, touchable finish."
Easy enough, right?! What do you think of Kate's hair and makeup look in our April issue?
Photos: Patrick Demarchelier